April 28, 2019 - Wild Life Photography – At the Zoo?

When you think about spending a day at the zoo, you think about someplace to take your kids or grandkids and making a memorable day of it.  Packing your point & shoot camera or cell phone is what you are programmed to do.  Pack your full frame Nikon with that 600mm zoom lens?  No way!  No really good wildlife shots will be had at the zoo.  There are just too many people, background not authentic, can’t shoot through glass, can’t shoot through wire, right?  Well, maybe not.  

I recently visited the Richmond, Virginia zoo to see what I could get.  Hey, it’s a lot less expensive than that African safari that practically all wildlife photographers dream about.  That day, my wife had business in Richmond.  I didn’t expect her back until late that evening, so I decided this would be the best day to go.  It would be like the photographer’s version of “Ferris Buhler’s Day Off”.  I packed up my gear, including that 150 – 600mm Tamron, and within an hour of her departure, I was on my way, too.

_B851652.jpg

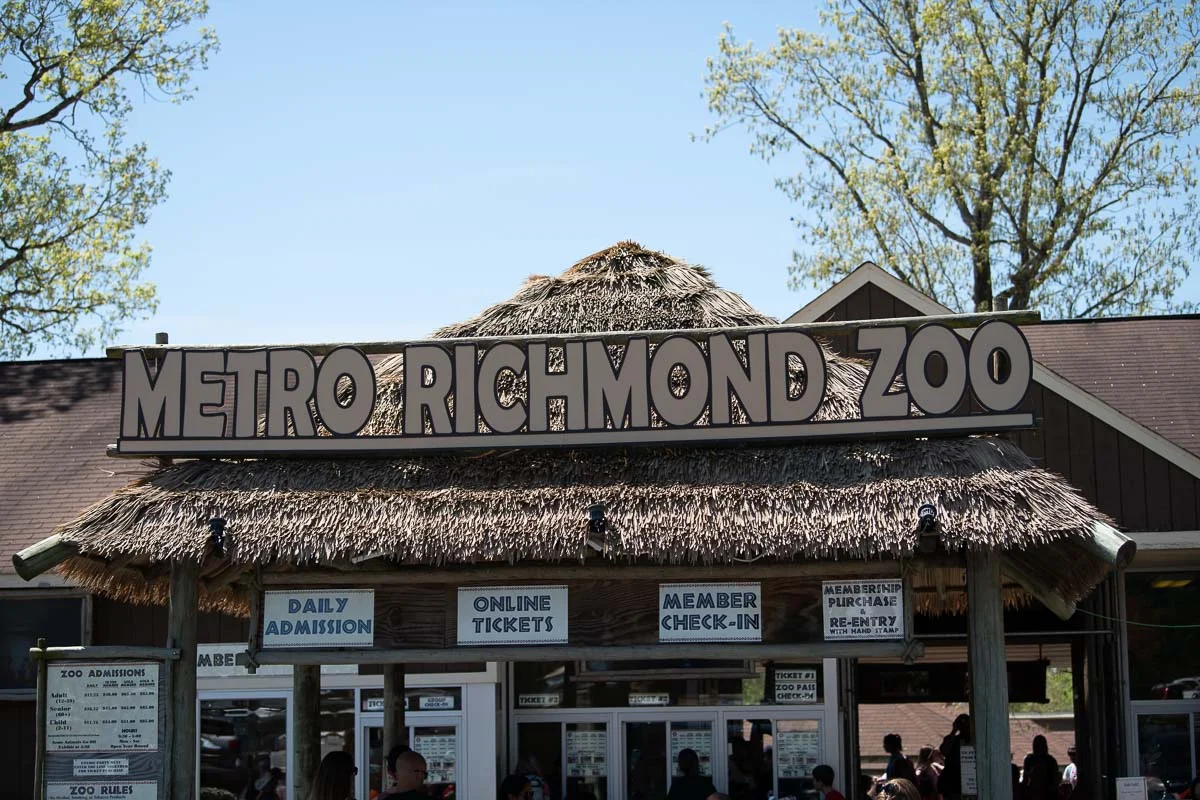
The zoo in Richmond is cozy, not too large but not too small.  There is a small picnic area and a snack bar where you can get a hot dog, or a chicken sandwich, and fries.  The mistake I made was not getting here early enough.  I arrived at 12:30 PM.  There were bunches of school busses all over the parking lot, and you know what that means.  There were a lot of kids running all over the place, having the time of their lives.  I would have to be patient, even more patient than just waiting for the animals to wake up from their naps and maybe wander into a photo worthy position.

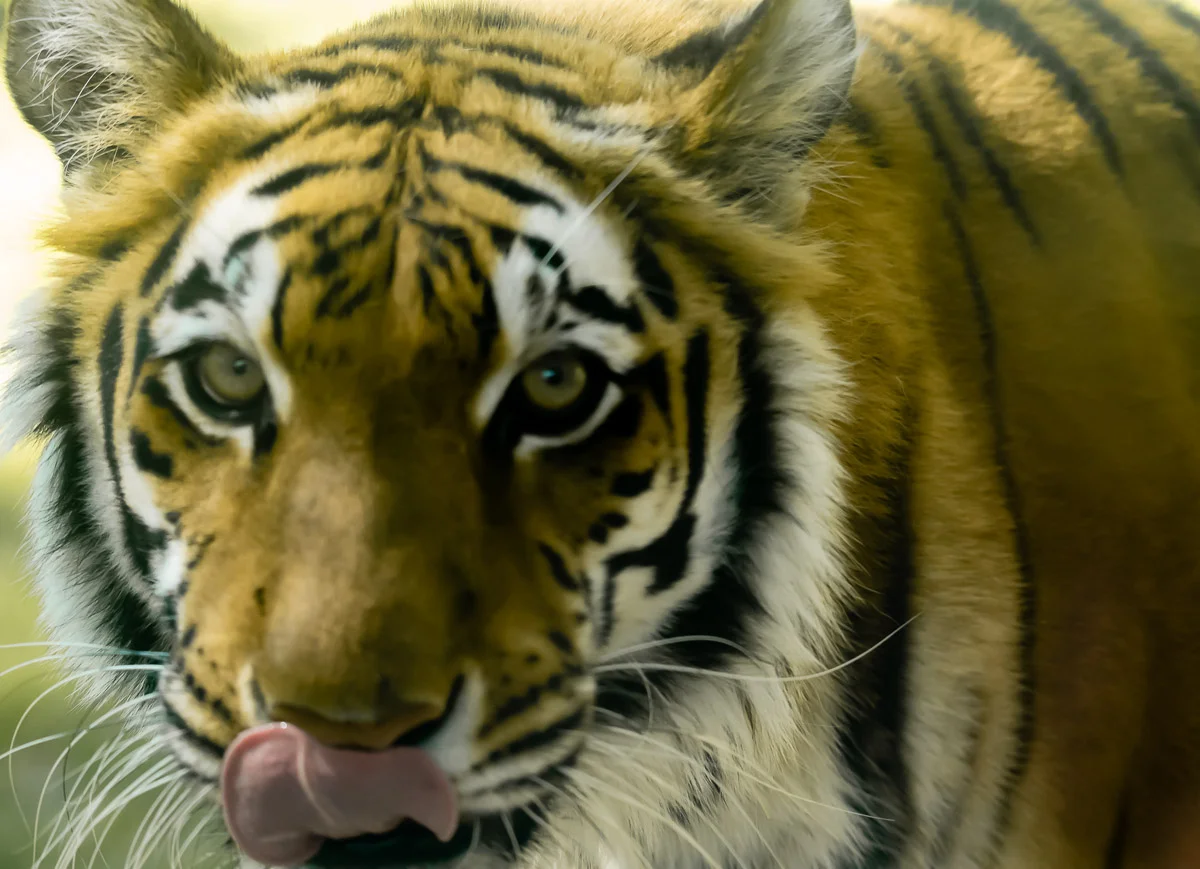
What was I after - lions, tigers, bears, and primates?  But what can you get shooting through scratched glass that has Joey’s ice cream sundae smeared all over?  Actually, quite a lot.  My favorite is the shot of the Tiger.

So, What’s on Your Mind?

So, What’s on Your Mind?

Look for areas of the glass that aren’t scratched, or at least, less scratched. Wipe that area clean with a rag.  Make sure Joey has gone and get the lens hood close or touching the glass.  Focus on the eyes and take a lot of shots.  When you get home, you can cull through your images.  Throw out the badly focused and badly composed images.  It will soon be apparent which one image is better than all the others.

Scratches and smudges are not the only challenges when shooting through glass. You can expect a color cast and some degradation in sharpness.  So, expect to do some post processing in Lightroom or similar application to get all that you can from your photograph.

Some of the animals like the orangutan don’t require hard physical barriers like the tigers and lions do.  They are separated by distance, terrain, and water.  So, while you don’t have to worry about glass or wire barriers, you will need a pretty long lens.  In the zoo environment you need to pay close attention to the background.  Nothing detracts so much from the authenticity of a wildlife image like a “No Parking” sign behind your otherwise perfectly composed wildlife subject.

Contemplation

Contemplation

Shoot with wide open aperture to reduce visibility of the background. Carefully focus on the animal’s eyes and take a lot of shots.  The image of this orangutan was made at 600mm f6.3.  Even at 600mm, I cropped this image substantially and could have used more focal length.

 Tips for successful Zoo photography:

·     Don’t push it. Enjoy and take your time.

·     The first two hours after opening and the last two hours before closing are best.

·     Don’t expect to get great shots of all the animals.  It’s better to come home with a few splendid images than uninspired snapshots of all the animals.  Be patient, pick your moments, and take a lot of shots.

·     The background will significantly influence the quality of your image.

·     Get close to glass and screen barriers and shoot at wide apertures.

·     Focus on the eyes and take multiple shots.


FEBRUARY 27, 2018 - MARINE COPRS MUSEUM

I visited the Marine Corps Museum last week.  It has been on my list of things to do for a while.  I finally got there, and I am glad I did.  I plan to return.  The displays are excellent.  I was there for several hours, but this isn't nearly enough time to see it all.  One attraction for me was the opportunity to take a few photographs.  For those of you who have tried to photograph museum exhibits, you know the difficulties.  There are many exhibits situated so close together that clutter is unavoidable.  Depending on the the background, clutter can take hours to remove in Photoshop.  If you aren't careful when you frame the shot, it may become a throw-away because it will take too long to edit it into something "believable".  "Believable" being something that doesn't look like it was taken in a museum.

The museum has several levels that allow you to get very close to the airplanes, probably the easiest exhibits to photograph.  Because of these different vantage points, it is possible to shoot at angles that make editing easier.  I have a couple of examples below.

B85_0992.jpg

This is the shot as taken at the museum.  You can see what I mean about clutter.  Since the clutter is behind the image, it is easy to remove.  I have replaced the background with a darker sky at sunset.  I think the red in the sky sells the image.  

WW1 Close Air Support-Edit.jpg

I took another shot of the WW-II airplane hanging from the ceiling.  It was heavily back lit and other exhibits were behind it - tons of background clutter, too.

B85_0986.jpg

The image below is with the clutter removed and a believable background in its place.  I wish I would have taken my polarizing filter with me.  I could have removed the glare on the canopy and actually seen through.  It would have been a better shot.  I was trying to travel light, so I just took the camera and one lens.  Next time I visit, I'll take a little more equipment.  A polarizing filter is small, valuable not just for blueing up skies but also for removing glare.

Straffing Run copy.jpg

These shots were taken with a Nikon D850 with a 20-70mm f2.8 zoom lens, so you can imagine how close I was to the airplane when I took the picture.  

I recommend visiting the Marine Corps Museum.  One other thing, be sure to visit the Combat Art Exhibit.  It is excellent!  It has all been created by Marines and some of the art is world class.

FEBRUARY 12, 2018 - New opportunities FOR old photos

Weather being unpleasant lately, I have been spending considerable time in Photoshop.  I am by no means accomplished, so a good deal of my time is being devoted to tutorials.  I am amazed at the design tools available for special effects.  I think someone with strong Photoshop skills could publish remarkable imagery using only stock photos and special effects - forget about a camera.  I am sure some do.

Much of the work I am doing at the moment involves photographing historic sites in Fredericksburg and publishing them with a little story.  I think many of the historic sites show better if they have a sketched or painted look, rather than a razor sharp appearance.  I am far more accustomed to producing the latter.  The amount of sophistication that can be applied to an image to make it appear a painting is limitless.   Real artists can make this stuff look ..... well, real - this old engineer, not so much.  I have posted the result below.   It was made from a photograph of sail boats in a marina in Herrington Harbor, Maryland.  This is a quick & dirty, first-cut attempt.

Herrington Sailboat Water Color.jpg

Best of all is, it works well with images that aren't really great.  Although in this case, I started from a technically strong image, low resolution, shallow depth of field, and a little image blur aren't problems.  In fact, most simulated water colors are blurred buy design before beginning the process.  Admittedly, this image isn't ready for "prime time", but for me, the process shows promise.  So If any artists happen to stumble over this post, this image is presented with my compliments for your amusement.

For those who have a copy of Photoshop, give this a try on some over cropped or maybe blurred images you thought were goners.

February 7, 2018 - Just Getting Started

How did I become bored enough to start a Blog - that I expect no one will ever read?  They say that the best place to hide dead bodies is on the second page of a Google search.  Well, now it's the second best place.  So with the expectation that no one (or at least not very many) will ever read this, it will serve as my semi confidential photo diary.  I'll call it my Blogary.

Dear Blogary (Feb 7, 2018):  So here I am at age 70 and then some.  I have lived in the Fredericksburg, Virginia area since 1969.  The story is typical of photography enthusiasts my age.  We started out with film cameras before our teen age years.  When we were in junior high and high school we were in the photography club.  We developed our own black & whites at home & pitched the chemicals down the drain.  It was way before the EPA and seat belts, too.  So long as I didn't explode something or set anything on fire, which occasionally happened, I was able to experiment on my own - an educational experience not much valued today.

Two Virginia Tech engineering degrees later and a well paying job, I got my first really cool camera.  It was a 35mm Minolta SLR.  I don't remember the model, but it was in the very early 1970's.  My first digital camera was an Olympus e-10.  I got that camera in 2001.  Some of the photographs on this website were taken with that camera.  Although the ones I have chosen to include are compositionally OK, they could use a few more pixels.   In 2010, for better or worse, I committed to Nikon.  The D700 had an affordable, full-frame sensor, and I invested quite a bit in full-frame lenses - who could resist.  Now, I am happily shooting the D850 - so many nice features, especially the focusing control stick - I love it for tripod shooting and focus stacking.

For the past 14 years, I have worked at Syntronics, as a Partner and Chief Executive.  We sold our company to General Atomics in October 2017 and, after a short consulting stint, I became a free agent in January 2018.  I started a new company called V-Poly Design, LLC in October 2017.  Later deciding I would rather focus more in the photographic arts arena, I purchased the domains for V-Poly Photography, as well.  

So, this is where my next career begins.  Although income is now not necessary, the desire to remain creative is.